Automating weather satellite reception with SatDump (GUI)
Also available in: Italiano 🇮🇹
Until now, building your own automated weather station to receive NOAA POES or METEOR-M VHF weather satellites was a complex task involving anywhere from 5 to over 12 separate programs, some of which were obsolete, abandoned by their authors and often they'd crash if you looked at them wrong.
It also involved a great deal of text file editing, Batch files, DDE text files, and a generally high headache level.
Gone are the days of virtual audio cables! Thanks to SatDump all this pain and suffering can be put to an end! With a few button clicks, you can configure it to automatically record and decode VHF weather satellite passes!
This tutorial is designed to replace Windows-based automated stations that previously ran the [SDR# - DDETracker - Orbitron - WXtoIMG] stack (for NOAA APT) and [SDR# - DDETracker - Orbitron - LRPT Demodulator - LRPT Decoder - SmoothMeteor - MeteorGIS] stack (for LRPT).
If you are looking for a solution to run headless, such as in a Linux single-board computer like the Raspberry Pi, follow this guide instead.
The basics
If you already had an automated station based around software like SDR#, DDETracker and Orbitron, you can skip this section and go straight to the Configuration!
I strongly recommend starting manually using the guides I have written, to get the hang of it and also test your equipment and find out if you have noise problems or line of sight limitations.
This is very useful to know your expectations: you will definitely get at least very slightly worse results than if you do everything manually, it's a given for every automated station!
If you're using a V dipole, you'll quickly find it to be very unsatisfactory for a permanent installation. I strongly recommend switching to a QFH antenna. Tutorials for building a QFH antenna are available, however keep in mind that building a QFH that works somewhat is simple, but building one that works well is very difficult and requires access to a Vector Network Analyser (VNA) for tuning. You can buy a ready-made one from FT8.co.uk at a very reasonable price, or from Wimo. These links are not affiliated, and are only here for your convenience.
Configuration
Download the latest version of SatDump and install it. Download the Windows Installer, this will come in handy later.
Follow through the instructions on the installer.
Configuring SatDump settings
The first step is to select your Ground Station location in the Settings tab, under the General SatDump panel.
The coordinates are in the DD.DDDDDDD° format (degree and decimals of degrees).
The altitude can also be set for more precise calculations, and is expressed in meters.
Make sure to also enable the Automatically Process Products checkbox, and click on Update TLEs now for good measure.
In the User Interface tab, disable Open Viewer after decoding. If not disabled, it could cause excessive RAM usage and eventually, a crash.
In the Output Directories tab, you can select where the files are output by SatDump after each satellite reception. If you want to change it, change the Live Processing Directory to your liking. Make sure the Live Processing Output Autogeneration option is also enabled.
Click on Save and restart SatDump.
Selecting and configuring satellites
Now, after restarting SatDump, go in the Recorder tab, expand the Tracking panel, then click on the Schedule and Config.
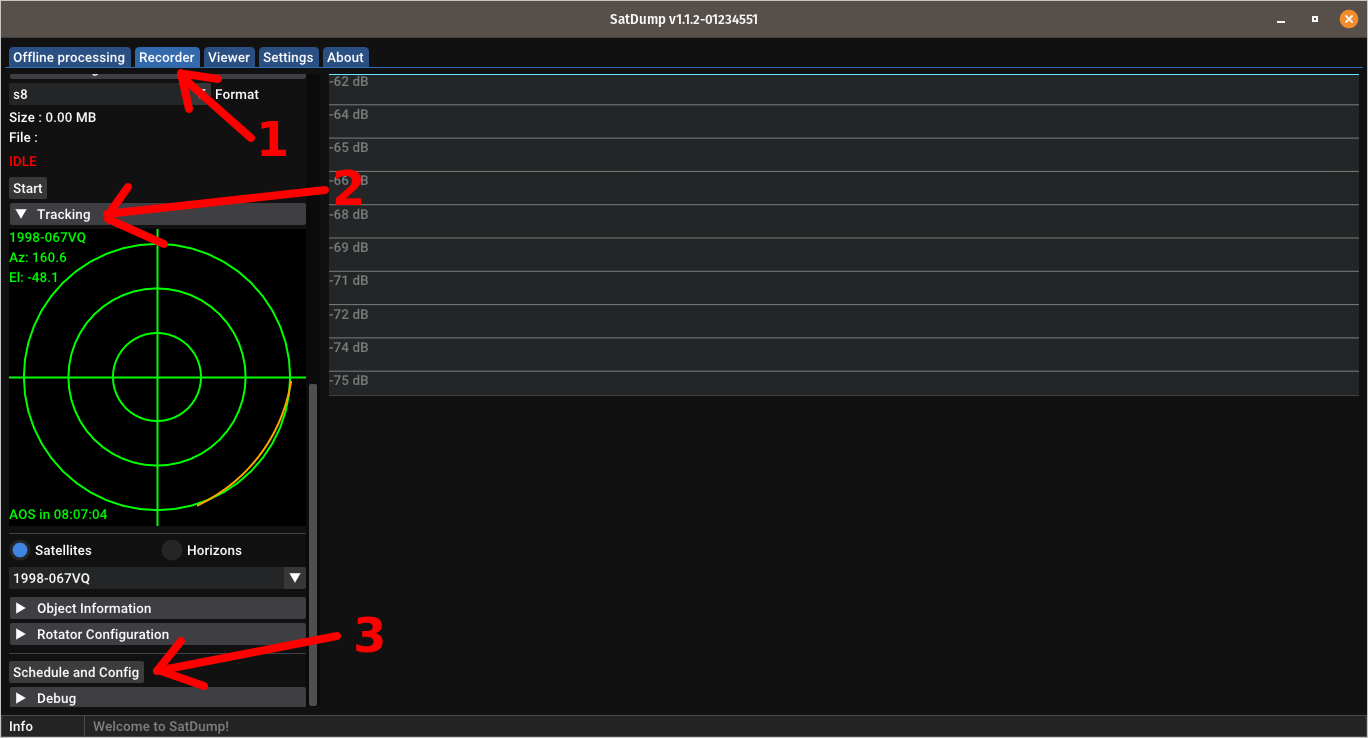
A window will appear, letting you search for satellites you'd like to automatically receive.
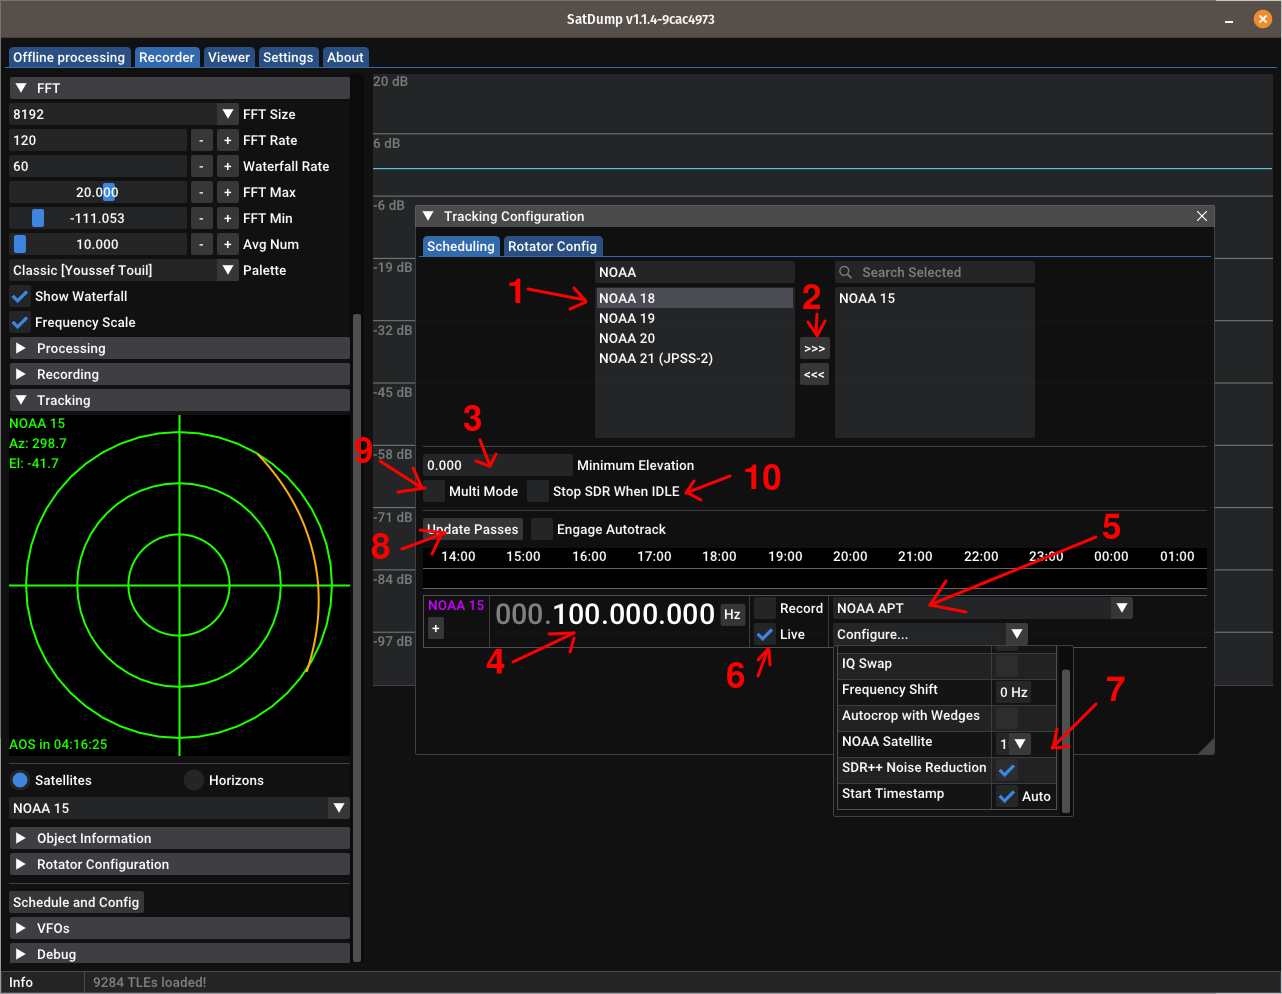
- Search for the desired satellite, such as
NOAA 15 - Click on it, and click the
>>>button. This adds it to the list of active satellites. - Type your minimum elevation, as desired. Passes below that will be ignored.
- Type the correct frequency for the satellite, such as
137.62. The frequency is in MHz. - Select the correct pipeline, for example
NOAA APT. - Check the
Livebox. You can check theRecordbox to record baseband, but beware this uses a LOT of space, up to 15-20 GB per pass!!! - Click on
Configure, and select the correct options for your satellite, such as:DC block(needed for RTL-SDR, MiriSDR, HackRF)NOAA satellite(for example, for NOAA 15 select15).Autocrop with Wedges: will automatically trim noisy parts of the images (Experimental), similar toShow allfeature.
- Click on
Update passes. - If you're doing APT/LRPT, enable
Multi Mode. This way, SatDump will be able to get many satellite passes at once, if the need arises. - To save power, you can check the
Stop SDR when idlebox. The SDR will be started automatically again when a new satellite is in range.
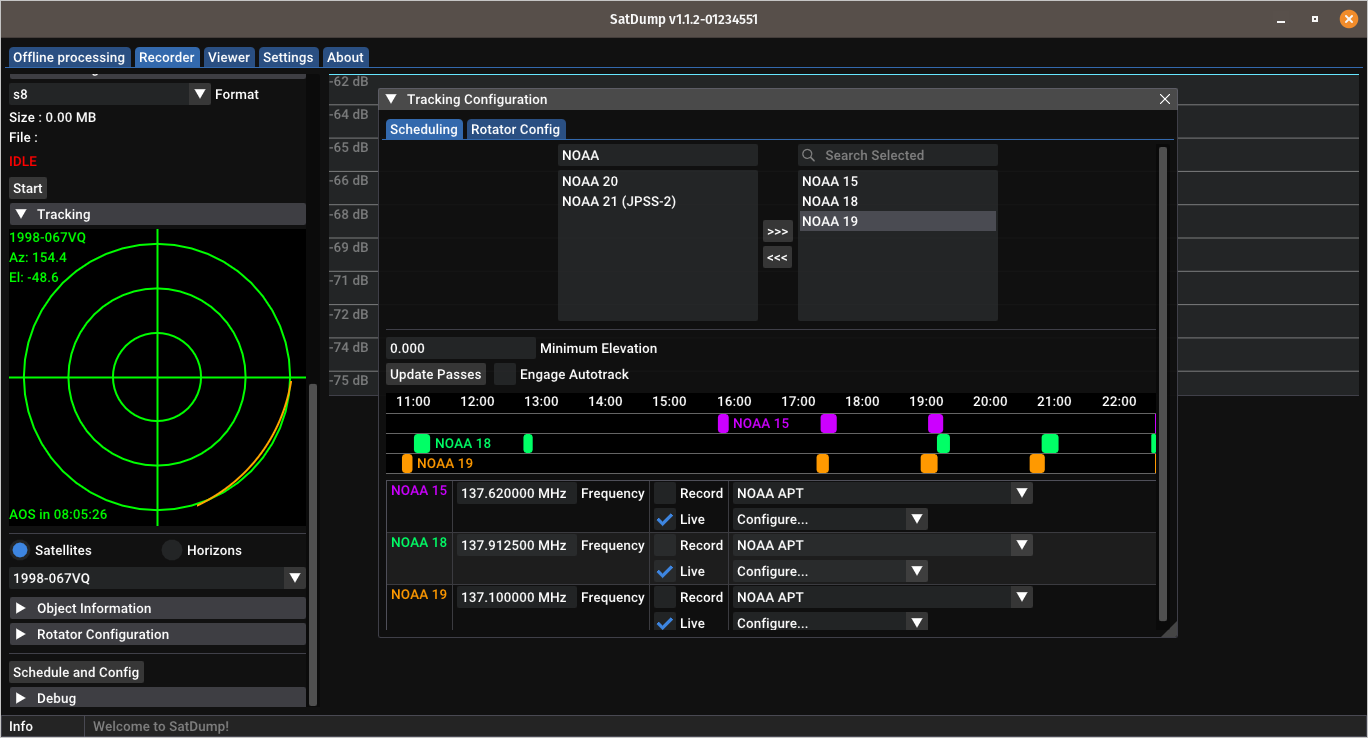
Repeat these steps until all your desired satellites are added.
You can also have with different downlinks, such as NOAA APT and METEOR-M LRPT! Just configure the pipeline accordingly.
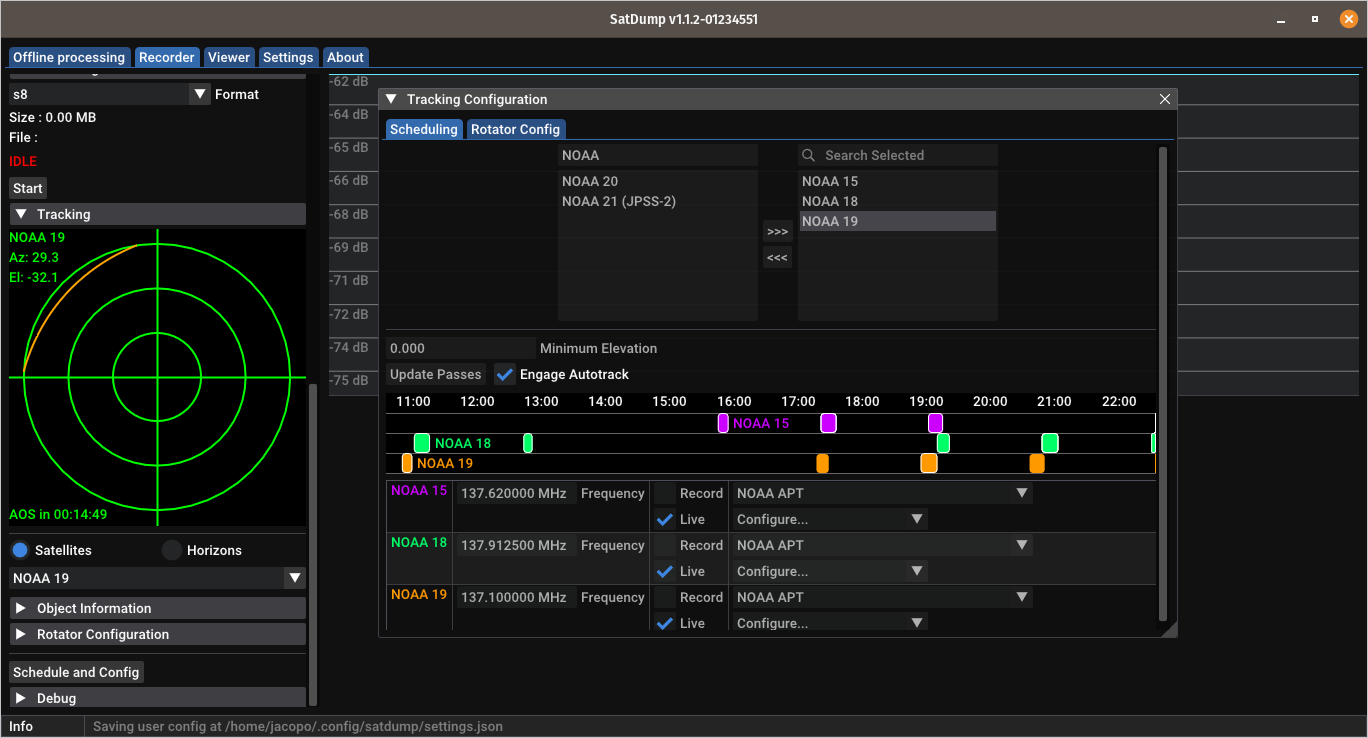
When you are ready, click on Engage autotrack, and close the Tracking configuration window.
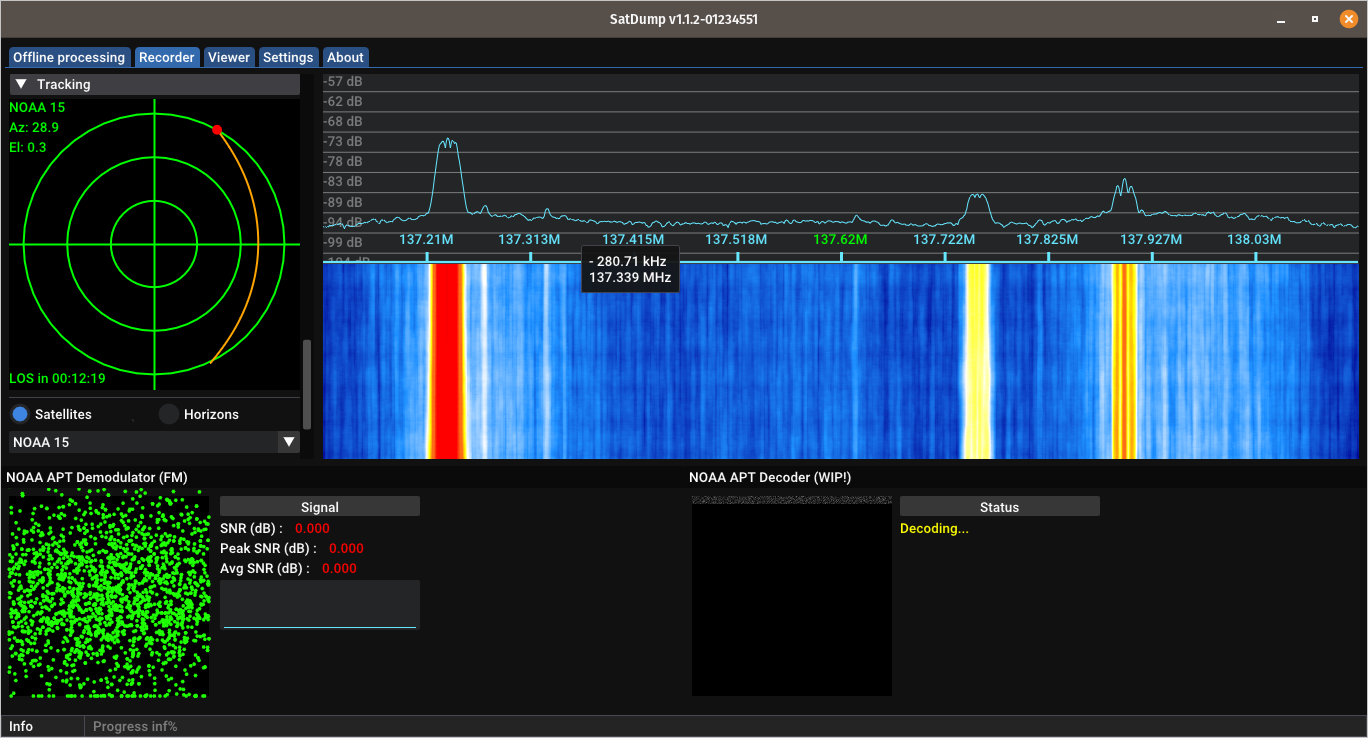
The radar screen will update to show the next passing satellite trajectory and the ETA.
Now, go to the Device tab, and select your SDR. Configure it appropriately, like setting the gain, enabling bias tee or notch filters, etc.
Do not set the frequency, it will be set automatically.
Now, start the DSP by clicking on Start. Now, the station is ready for a test run.
Test run
It is important to do a test run where you attend the station, verify everything is working as it should, adjust the gain to its optimal level, and check what sort of performance you get.
If you need to wait a long time for a pass, you can close SatDump and reopen it 5-10 minutes before the pass.
To re-engage the test mode, do as follows:
- Go to the
Recordertab and start the SDR.- Open the
Trackingpanel, click onSchedule and config, and click onEngage autotracking. Close the panel now.
When the AOS is reached on the first satellite, SatDump will automatically switch to it and start the recording as configured.
You can use this time to adjust the SDR gain and antenna for best results.
On NOAA APT, it is normal for the SNR meter to stay at zero. NOAA APT is analog, and the SNR meter is meant for digital signals only.
When the recording is done, SatDump will automatically stop. STOP the SDR, and wait for the products generation to complete (you can check by clicking the status bar button at the bottom of the screen).
Then, close SatDump. Everything is ready now to make your station permanent.
Making it permanent
To make it permanent, as well as make SatDump start automatically if the computer is rebooted (ie. due to a power outage), a few clicks are needed.
Remember that desktop icon you created while installing SatDump? Time to use it!
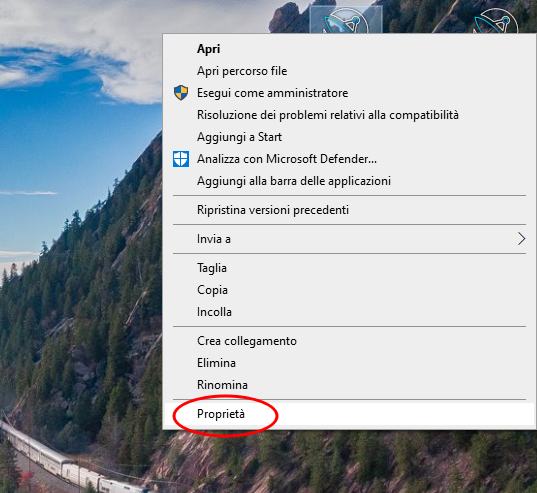
Create a copy of SatDump's desktop icon. Right click the copy and select Properties.
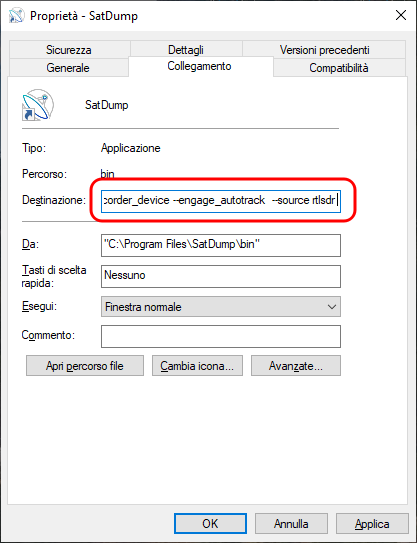
Now, in the Destination field, add these parameters at the end:
--start_recorder_device --engage_autotrack --source <SDR>.
<SDR> needs to be edited according to the model of SDR you are using:
rtlsdrfor RTL-SDR (RTL-SDR V3, Nooelec SMArt/SMArtee, etc.)airspyfor Airspy devices (Airspy, AirspyHF, etc.)hackrffor HackRF originals and clonessdrplayfor genuine SDRplay devices (RSP1A, RSPduo etc.)mirisdrfor Mirics MSI2500 based SDRs such as RSP1 clonesplutosdrfor Analog Devices ADALM-Pluto based SDRs (including AntSDR or PlutoPlus)bladerffor BladeRFlimesdrfor LimeSDR
In the end, the entire Destination field should look something like this (for example, for a RTL-SDR):
"C:\Program Files\SatDump\bin\satdump-ui.exe" --start_recorder_device --engage_autotrack --source rtlsdr.
Apply and close the Properties window. Rename the shortcut to SatDump - Autotrack.
Open the newly created shortcut, go to the Recorder tab, click on Schedule and Config in the Tracking panel. Engage Autotrack should already be checked. Close SatDump for now.
Making SatDump start when the computer starts
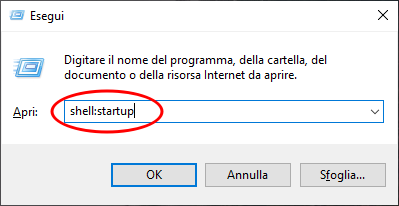
Press the Windows+R keys or search for Run in the Start menu.
Type shell:startup in the Run window, and click OK.
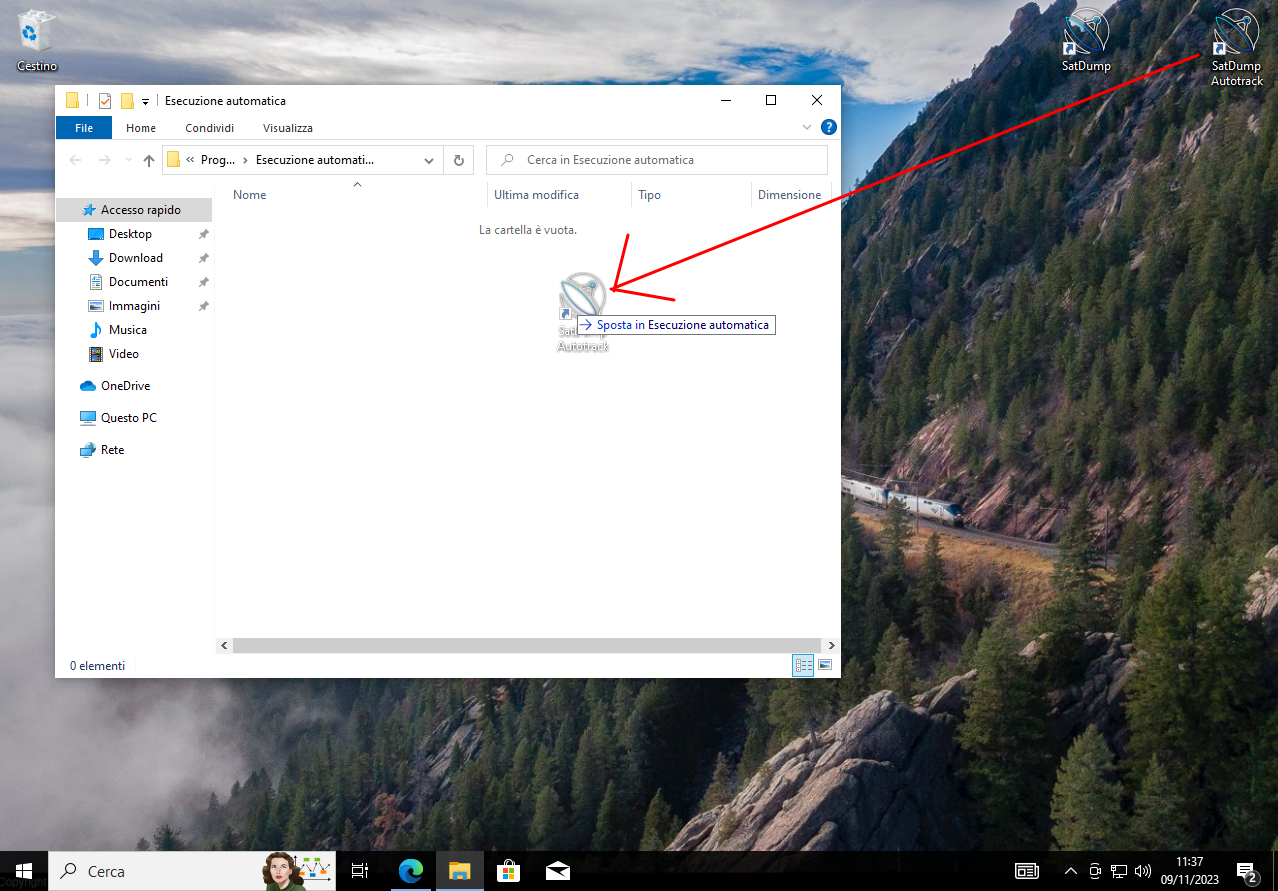
Drag the SatDump - Autotrack icon from the desktop to the newly opened folder.
Reboot the computer and check that SatDump starts automatically.
You're done!
Automation behavior
- If two satellites pass at once, SatDump will select and receive the one with the highest elevation first, then when the first satellite sets, it will switch to the one with a lower elevation and get the rest of its pass.
- If the SDR is stopped, SatDump will start it automatically.
- In the live capture directory, captures will be saved in separate folders named with the satellite name and date/timestamp.
Editing the autogenerated composites to your preferences
SatDump will autogenerate composites (image type and enhancements) following the master configuration file called satdump_cfg.json as detailed in the documentation page for the composite system.
To override these preferences, such as for example to remove a composite you don't like/need, or to add a personalised one, follow these instructions.
-
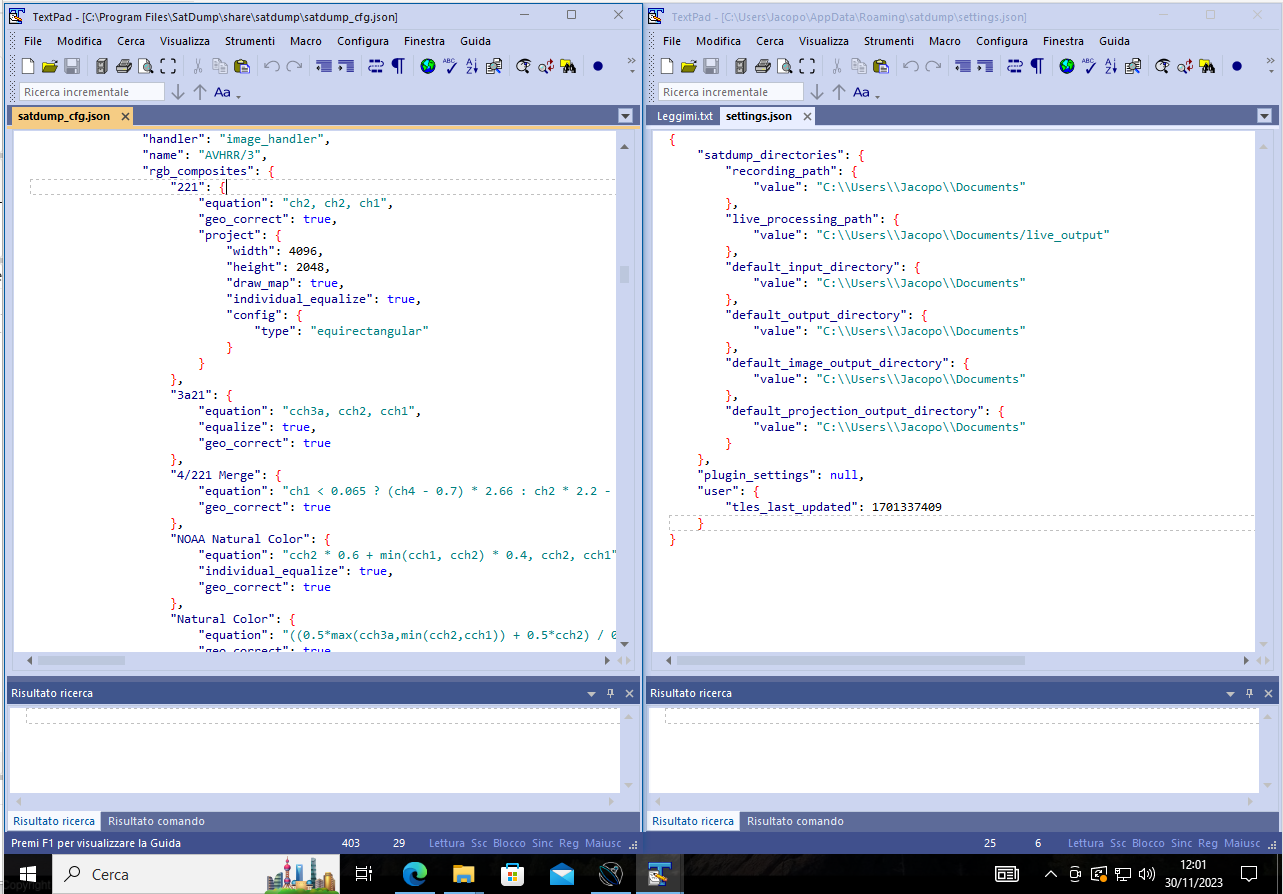
Locate the master
satdump_cfg.jsonfile. This is usually inC:\Program Files\SatDump\share\satdump\satdump_cfg.json, unless you changed it during the setup phase. Open it in a text editor, such as Textpad or Notepad++. -
Locate and open the user
settings.jsonfile. To open it, press theWindows+Rkeys or search forRunin the Start menu, and type%appdata%\SatDump\settings.json.
-
To disable generating a composite you do not like, go in the appropriate section (
avhrr_apt) and copy the name of the composite. Then, setautogentofalse. -
To enable a composite, do the same but set
autogentotrue.
For further details see the documentation page.
Version: v1.0.1