CORIOLIS satellite reception
CORIOLIS satellite failure
Unfortunately CORIOLIS has suffered a violent event. The WindSat instrument, which is large and rotates relatively rapidly, has suddenly jammed, sending the satellite into a tumble. The satellite immediately safed and was brought under control by the specialists, but so far the instrument hasn't restarted and the data contains only filler.
This guide remains for those interested in finding its signal, but don't expect miracles, it could be decommissioned at any time.
Introduction
CORIOLIS is a weather satellite designed to measure, among other things, the speed and direction of wind above oceans. The principle of operation is simple, as wind causes the sea to roughen, the microwaves sent by the satellite are scattered in different ways and received with different polarizations. Then, after some calculations, it is possible to extrapolate wind vectors as well as wave magnitude and swell.
Since the microwave frequencies are also absorbed by clouds, it is possible to measure cloud coverage and humidity as well, although this is not the satellite's primary purpose.
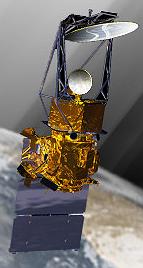
©US Navy
Signal description
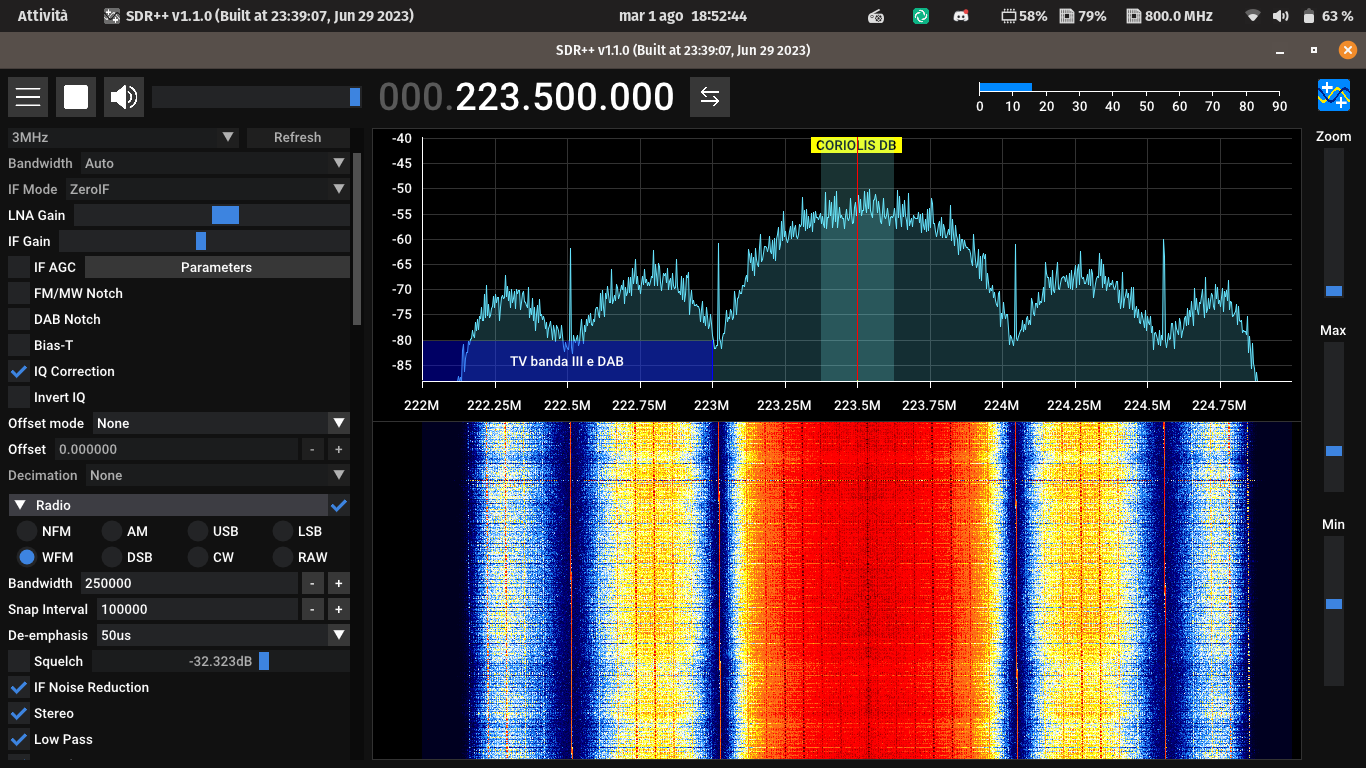
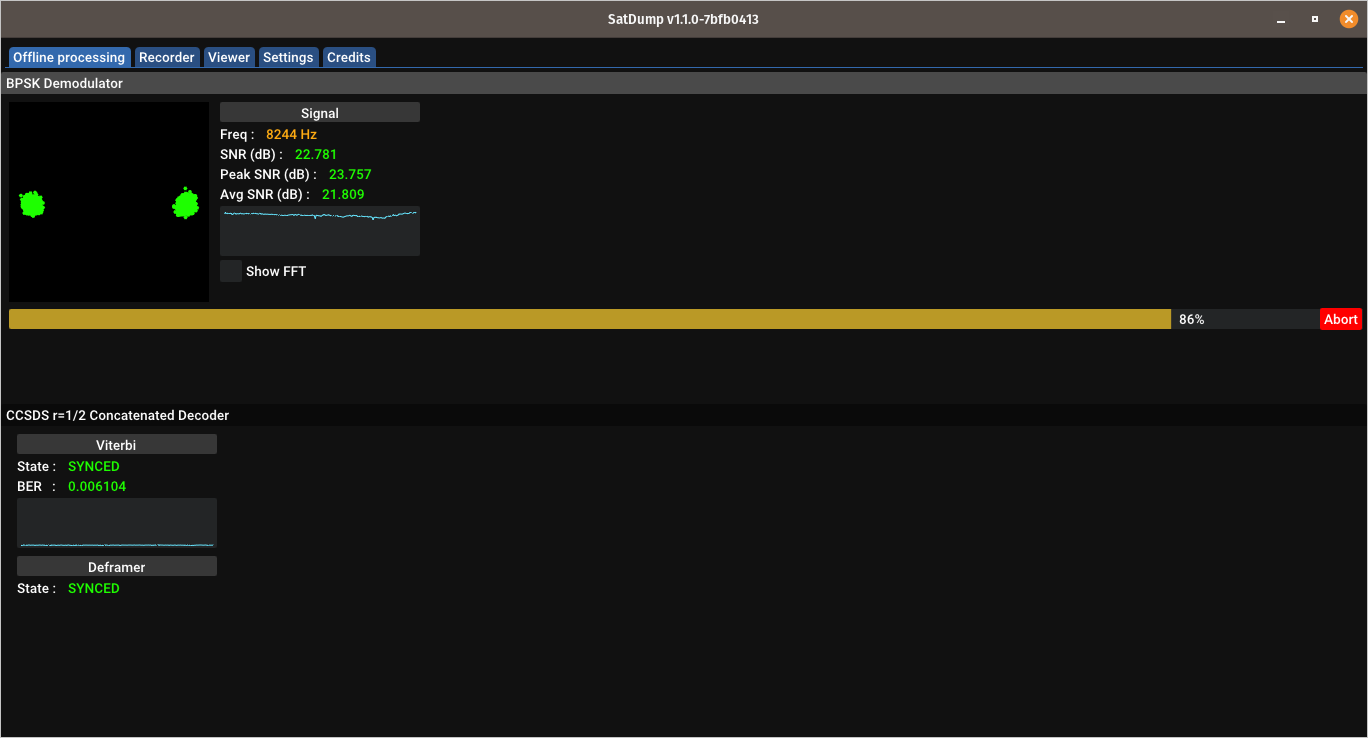
The CORIOLIS satellite transmits data in a CCSDS (Consultative Committee for Space Data Systems) compliant format, with BPSK modulation, as well as Viterbi and Reed-Solomon forward error correction. The frequency used is in the S band, with a 2 MHz bandwidth, at 2221.5 MHz.
Unusually for S band satellites, CORIOLIS operates in a direct broadcast mode, like most of other weather satellites.
Hardware
SDR
Any SDR of sufficiently good quality can be used. I use a Nooelec SMArtee, that retalis for around 30 euros, and is based on the RTL2832u chip with a R860 tuner.
You do not need a SDR capable of directly receiving the S band, because there is a much easier way using a down converter that will bring the output frequency to around 220 MHz.
Downconverter
An S-band capable SDR would be very expensive, and would additionally need a LNA and especially a good quality cable capable of transporting the microwave frequency without excessive loss.
Thankfully, in the US and in Asia a TV distribution system called MMDS (Microwave Multichannel Distribution System) is deployed, that makes use of frequencies in the S-band range, specifically from 2.2 to 2.7 GHz.
Because of the aforementioned cost issues, the raw frequency is never transmitted to a TV (which wouldn't be able to receive it anyway) but is converted to something much lower.
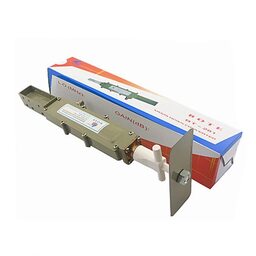
The MMDS converter uses a Local Oscillator (LO) tuned to 1998 MHz, so the output frequency is exactly 1998 MHz lower than the input frequency.
In our case, CORIOLIS transmits at 2221.5 MHz, so we do 2221.5-1998 and we get 223.5 MHz, easily receivable by any RTL-SDR.
As all mass-produced TV accessories, the converter needed is extremely cheap, on the order of 30 euros.
The MMDS converter also needs to be modified to accept a signal from an external antenna (as the integrated one is not suitable for satellite reception). In my case, an N panel mount connector happened to fit perfectly in the place of the integrated antenna, by reusing the original screw holes and screws, and as a bonus it was also possible to retain the original gasket so the converter is still water resistant.
Mind the frequency: check that the converter you are purchasing is of the correct type! The frequency range must be 2200 to 2400 MHz, and the local oscillator 1998 MHz. The 2400 to 2700 MHz type is not suitable!
This is the MMDS I use. It is sold on Aliexpress, but you can find some used on eBay as well as other websites.
Power supply (bias tee)
The MMDS is powered by 12 volts, and to achieve that it is sufficient to use any TV antenna power supply (bias tee) commonly found in any antenna or electrician's shop.
Dish
As the signal is quite weak compared to a terrestrial TV signal, we need to use a dish to amplify it. I use a 100 cm offset dish, but a regular 80 cm Satellite TV type dish (such as a Sky or DirecTV dish) will work just as well as the signal is strong with respect to some other satellites.
It is essential that there are no obstacles around the dish, as those will completely block the signal. Trees are okay if small and without too many leaves, but trees that cast a significant shadow or have dense foliage such as cypress or spruce will also block the satellite signal.
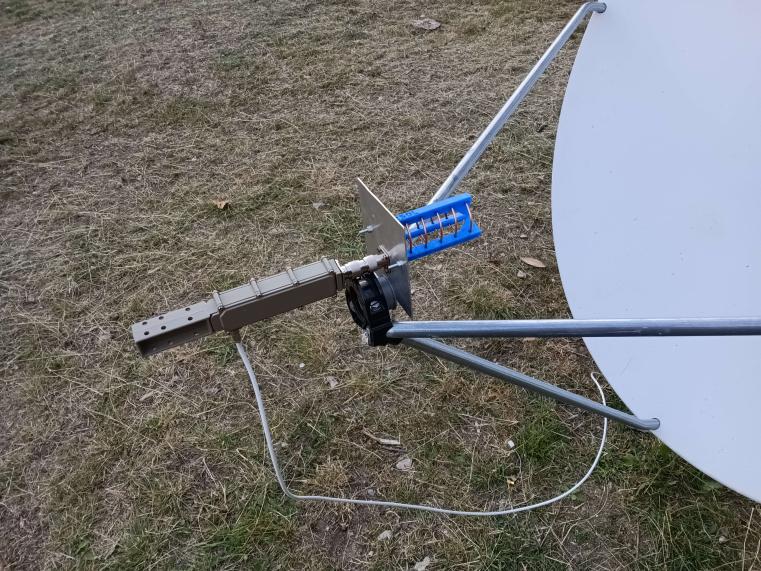
Dish feed
There is no feed for 2.2 GHz available for purchase at a reasonable price, therefore the most practical approach is to DIY it, and the most practical kind of feed to build is a helix.
The measurements for the helix feed are:
- Wavelength: 13.63 cm
- Reflector side or diameter: 11 cm
- Spiral diameter: 4,4 cm
- Space between the windings: 2,45 cm
Note that an 1.7 GHz helix feed (for HRPT) will manage to receive with some success CORIOLIS, as helical antennas have a very wide bandwidth (an helix designed for 1.7 GHz will work just as well with almost the same gain at 2 GHz). Also, the same dish will have a better performance with a higher frequency, compensating to some extent the loss of a wrongly designed feed.
DerekSGC has made some 3D printable scaffolds that greatly simplify the work needed to build the feed. The file to choose is: 2250L_5.5T_0.14S_4D_10-80M.stl (2250 MHz, LHCP polarization).
Software
SatDump can directly demodulate and decode the satellite signal live, but I prefer doing the reception in two steps. First, the baseband is recorded using any SDR software (such as SDR++) and then it is fed to SatDump for demodulation and decoding.
Pass prediction
The satellite passes can be predicted using Orbitron on Windows or Linux (Wine), Gpredict on Linux, or Look4Sat on Android.
Dish aiming
As the dish is quite directional, it needs to be aimed at the satellite to work. It really isn't that complicated, but it requires good concentration and a bit of practice.
There isn't a whole lot to explain, but the basics are: look where the satellite will appear over the horizon, and roughly point the dish there. Then, when the signal appears on the screen, start recording and adjust the dish for the best signal strength and keep adjusting until the satellite sets.
Here's a screenshot of the signal:
Decoding
To decode the signal, it is simply a matter of opening SatDump, selecting Coriolis S-band Tactical DB from the pipelines, and then choose the baseband and an output folder. Satdump will do the rest for you.
Data processing
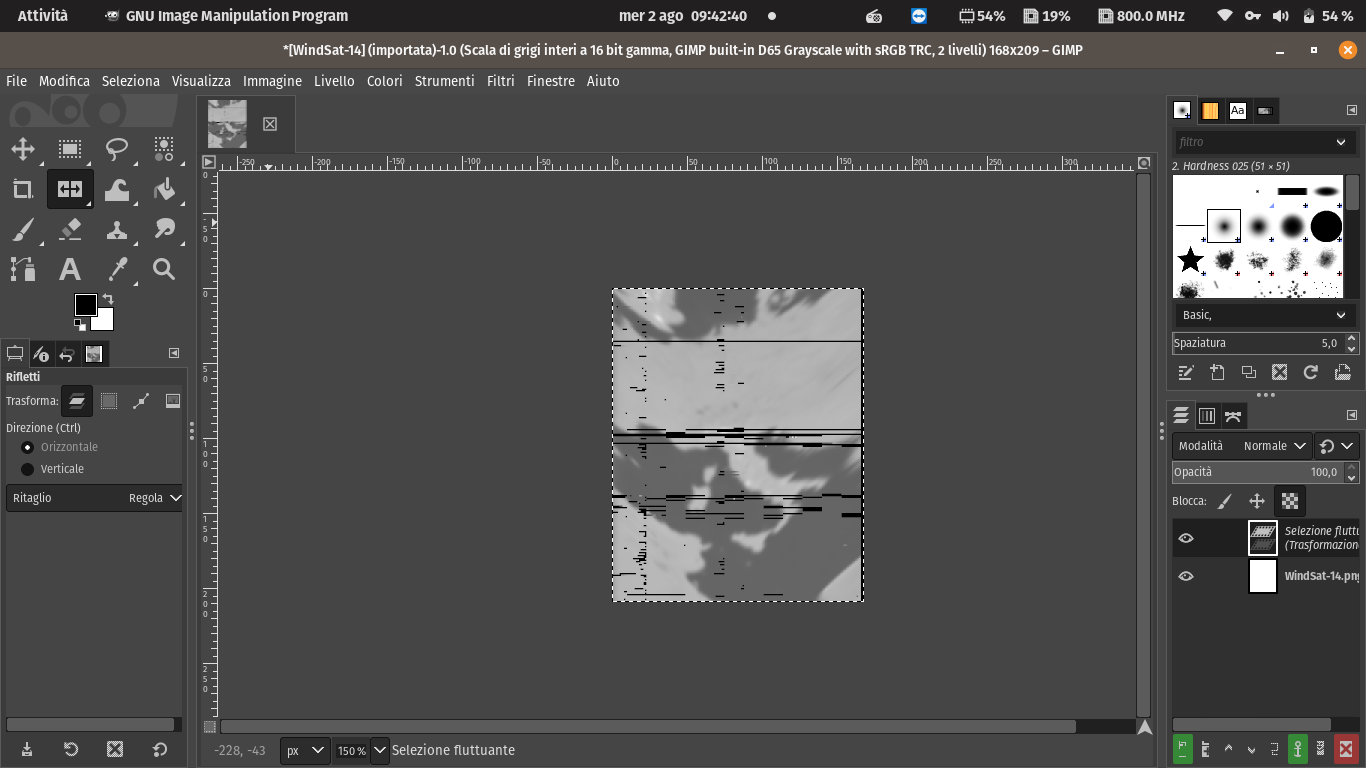
At this time, SatDump simply outputs raw images from the satellite with no processing at all, so in order to make sense of the data, it is necessary to process it manually.
The first thing to do is to flip and mirror the image using GIMP or Photoshop, and cut away any degraded/mirrored parts. Repeat until you can see the geography in a more or less correct way (some distortion will be unavoidable as it is the way the satellite scans).
Next, a small Python script I made is used in order to add a color map on the image, which will make the image much easier to interpret.
The usage is as follows: python3 heatmap.py nomefileimmagine.png ocean_r.
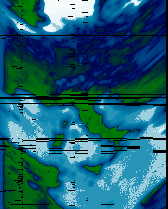
This image is already enough to make sense of the sea state: lighter shades of blue indicate rougher seas, while darker ones indicate calmer seas.
Naturally this is only a small part of what the satellite can do and provide as data, but it is already a great starting point.
Have fun with CORIOLIS!
Version: v1.0.1